
How to Dry and Preserve Herbs: A UK Grower’s Guide
I sometimes use affiliate links in content. This doesn’t cost you anything but I may make a commission payment from anything you buy through these links. As an Amazon Associate I earn from qualifying purchases. All opinions remain my own.
There is a particular kind of October panic that only herb growers know. The rosemary has doubled in size, the sage is sprawling over the path, and the last of the parsley is still going strong, yet the forecast says frost is a week or two away and every surface in the house feels damp. All that flavour is about to be lost to the first hard freeze, and you are standing in the garden with a pair of secateurs wondering where to begin.
The good news is that preserving a herb glut is far less fiddly than it looks, even in a climate that seems determined to fight you. What matters is knowing which herbs to cut and when, which ones are worth drying, and which ones are better tucked into the freezer. This guide is written from the grower’s side of the fence, with British weather in mind, so you can turn an autumn surplus into a winter store without a dehydrator, a special room, or a sunny spell that may never arrive.
🌿 When to Harvest Herbs for Drying
Timing is the part most people skip, and it makes more difference to flavour than the drying method does. Herbs hold their aromatic oils in their leaves, and those oils peak at certain moments.
Cut on a dry morning, once the dew has lifted but before the sun is high. Wet leaves invite mould in a damp house, and a hot afternoon sun drives off some of the oils you are trying to keep. In a typical UK autumn, a dry window of a few hours is often all you get, so keep an eye on the forecast and cut when it opens.
Forged & Grown
Garden pieces, printed to order
3D printed planters and garden accessories, made in the UK. Self-watering designs, sculptural shapes, colour options — each one made when you order it.


For most herbs, the best flavour comes just before they flower. Once a plant puts its energy into flowers and seed, the leaves can turn bitter or thin. Oregano, marjoram, thyme and mint are the clearest examples.
If yours have already flowered, you can still dry them, but expect a slightly milder result. Lavender is the exception: you want it just as the first flowers open on each stem, which is why it belongs to the summer harvest rather than the autumn one. If you grow it, our lavender growing guide covers pruning and cutting times in detail.
The autumn cut is your last big one. Woody perennials such as rosemary, sage and thyme can be harvested generously in early to mid October, but avoid cutting hard into old, bare wood, because it rarely regrows and a late, severe trim leaves the plant exposed to winter cold.
Take the soft green tips and the outer growth, leaving at least a third of the plant intact. Tender herbs, basil above all, should come in before the first frost, which blackens them overnight.
A sharp, clean pair of snips makes tidier cuts and spares the plant. A decent pair of budget secateurs is more than enough for herb work, and keeping them clean between plants helps stop disease travelling around the bed.
✂️ Prepping Your Harvest
Preparation is short and sensible, and it protects the whole batch.
Shake each cutting gently to dislodge insects, then strip off yellowing or damaged leaves. Whether to wash is a judgement call.
If the herbs grew in clean, mulched beds and the cutting is tidy, a good shake is usually enough, and every drop of moisture you add is something your damp house then has to remove. If they are properly dirty, rinse them briefly in cool water and pat them thoroughly dry with a clean tea towel, then leave them spread out for an hour before bundling.
Keep bundles small. Five to eight stems tied together is plenty for sprigs of thyme or oregano.
Tight, thick bunches trap moisture in the middle and are the usual reason a batch turns musty rather than crisp. Tie with string or an elastic band, because stems shrink as they dry and a loose knot will slip.
🏡 Drying Herbs in a Damp UK Home
Most drying advice assumes a warm, dry kitchen. A British October does not offer one, so the aim is to move air and, if needed, add a little gentle warmth. You have several options, and you do not need all of them.
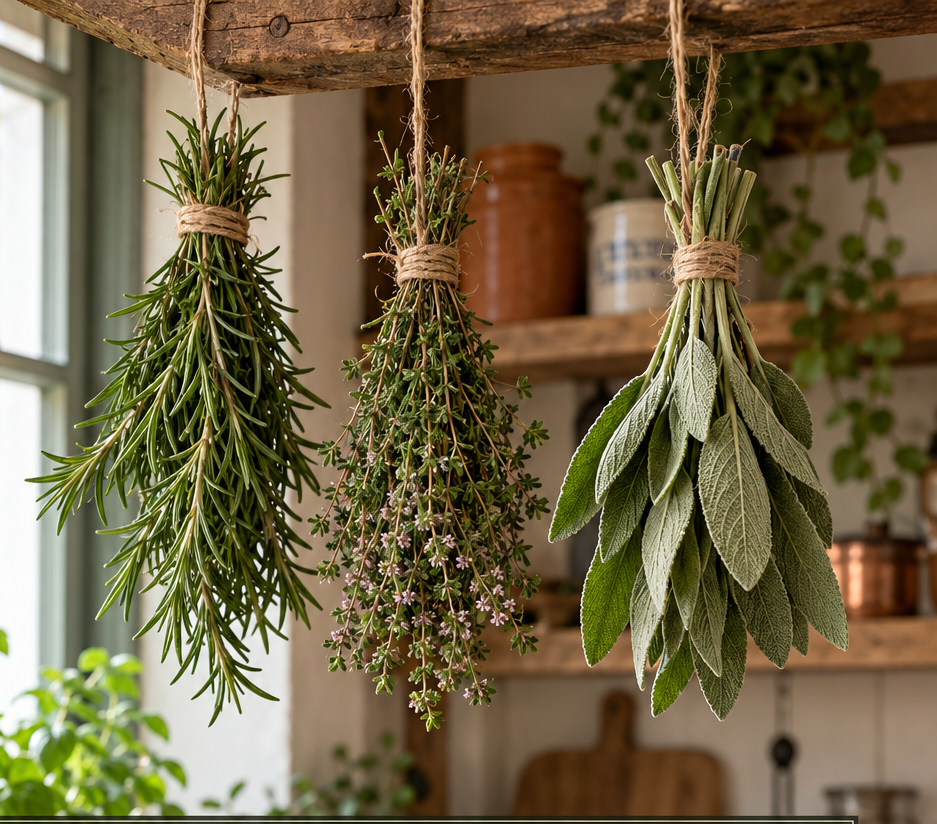
Hanging bundles. The classic method still works if you give it help. Hang small bundles upside down in a warm, airy spot out of direct sun: a spare room with a dehumidifier, the top of a warm kitchen away from the cooker steam, or near a boiler cupboard. Slipping each bundle into a paper bag with a few holes punched in it keeps dust off and catches any falling leaves, while still letting air through.
Avoid plastic, which traps moisture. Expect one to two weeks, and longer if the weather is wet.
The airing cupboard. If you have one, this is the best friend of the UK herb grower. The steady warmth dries herbs quickly and reliably.
Lay sprigs in a single layer on a tray lined with baking paper or on a clean cooling rack, and check after three or four days. Do not pile them up.
A low oven. When the weather has beaten you, this is the quick rescue. Set the oven to its lowest setting, ideally around 50 to 80°C, spread the leaves on a lined baking tray, and leave the door slightly ajar. Check every 15 minutes or so, turning the leaves as you go.
Most herbs are done in one to two hours. Never leave the oven unattended, and if your lowest setting runs hotter than this, shorten the time and watch closely, because scorched herbs taste bitter. Fan ovens often run well at a very low temperature, which helps.
A dehydrator. Convenient if you already own one, but not essential. For temperatures and timings side by side, see the comparison of air-drying, dehydrator and oven methods on Green Herb Guru.
🌱 Herb by Herb: What to Dry and What to Freeze
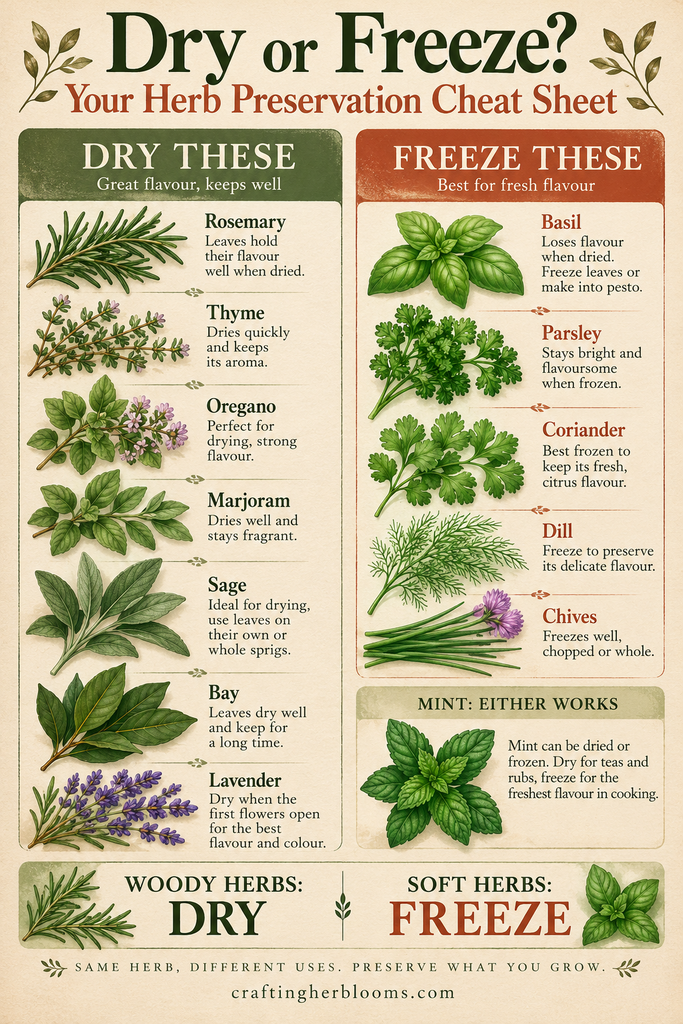
This is where growing knowledge pays off. Herbs fall into two broad camps, and fighting that is how you end up with grey, tasteless basil.
Woody herbs that dry well
Sturdy, resinous herbs have low water content and strong oils, so they dry beautifully and hold their flavour for months.
Rosemary dries easily on the stem. Once brittle, run your fingers down the stem against the direction of growth and the needles will fall off. Store them whole; crushing them early makes them go stale faster.
Thyme is probably the easiest herb of all to dry. Hang small bundles, and when the leaves rustle, rub them off the stems.
Oregano and marjoram dry especially well and often taste stronger dried than fresh. This is one of the few cases where drying actually improves a herb for cooking. If you want to know more about growing these Mediterranean types in our climate, see our guide to Mediterranean herbs in UK gardens.
Sage has big, fleshy leaves, so strip them from the stem and dry them in a single layer rather than hanging whole bunches. Sage can be slow to dry in a damp house and is a good candidate for the airing cupboard.
Bay is easy. Leave the leaves flat on a rack for a couple of weeks; the flavour mellows nicely.
Lavender dries well hung in small bundles, and is lovely for culinary use as well as for scented bags.
Soft herbs that are better frozen
Soft, leafy herbs hold a lot of water. They darken, lose their aroma, or turn to dust when dried. Freezing keeps far more of their character.
Basil is the classic case. Dried basil is a pale shadow of the fresh leaf.
Blitz it with olive oil and freeze the paste in ice cube trays, or freeze whole leaves flat on a tray before bagging them. If you have grown a great deal, our ultimate guide to growing basil explains how to keep plants productive until the last cut.
Parsley freezes well chopped. Open freeze it on a tray, then tip into a tub, and you can scatter it straight into cooking. It does dry, but the flavour is much weaker, and our guide to growing your own parsley shows how much better it tastes frozen.
Coriander, dill and chives are the same story. Chop and freeze them in small portions, or pack them into ice cube trays with a little water or oil. Chives especially turn dull and papery when dried.
Mint can be dried, and many people do for tea, but freezing in ice cubes keeps its brightness for cooking. Our mint growing guide covers keeping it in check.
A useful rule of thumb: if the leaf is tough and the plant is woody, dry it. If the leaf is soft and the stem is green, freeze it.
🫙 Other Ways to Preserve a Surplus
Drying and freezing cover most needs, but there are a few other ways to use a glut that suit the keen cook.
Herb salts. Blend roughly equal weights of chopped fresh herbs and coarse sea salt, spread on a tray, and leave to dry for a day or two (or in a very low oven for a short time). The result is a flavoursome seasoning that keeps for months. Rosemary, thyme and sage all work well.
Herb vinegars. Pack clean, dry sprigs into a sterilised bottle, cover with white wine or cider vinegar, and leave in a cool dark spot for a few weeks before straining. Tarragon, thyme and chive vinegars are simple and keep well.
A note on oils. Take care here. Herbs steeped in oil at room temperature can create the conditions for harmful bacteria, so do not make big jars of herb oil to keep on a shelf.
If you want the convenience of oil, freeze the herb and oil mixture in small portions and use it straight from frozen. For the full detail on safe preserving methods, the Green Herb Guru guide to preserving fresh herbs walks through each one carefully.
If you are not ready to preserve everything and just need to keep cuttings fresh for a few days, our guide to storing fresh herbs from the garden has the quick fixes.
🍃 How to Tell When Herbs Are Properly Dry
Under-dried herbs are the main reason stored batches spoil, so this check is worth doing carefully.
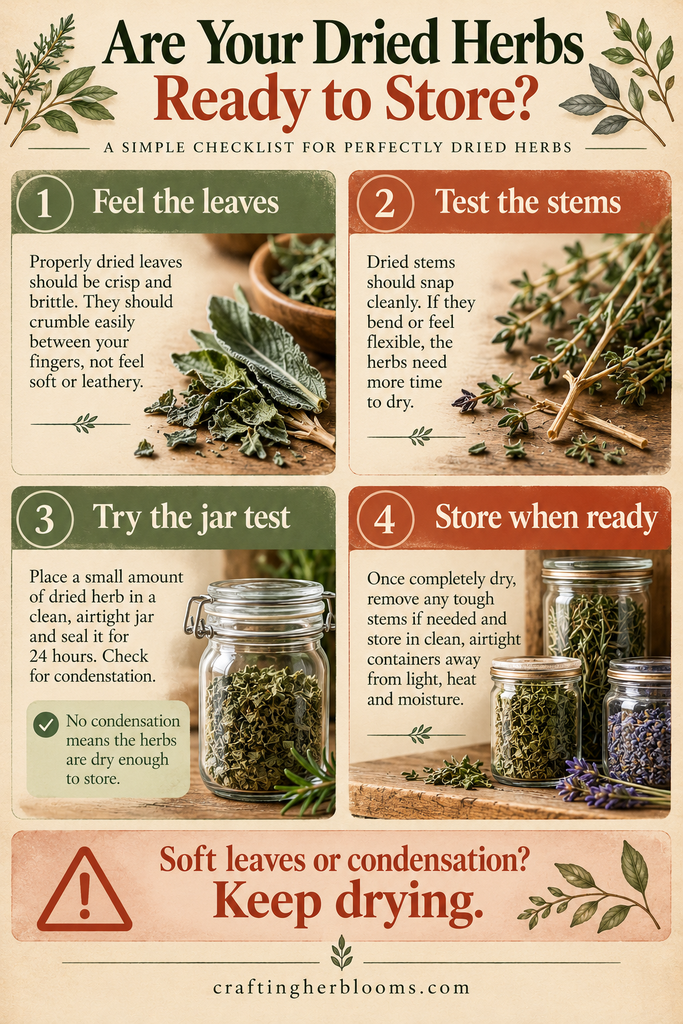
Properly dry leaves feel brittle and crumble between your fingers. Stems should snap cleanly rather than bend. If a leaf feels leathery, cool or even slightly soft, it needs more time.
A reliable test is to put a handful of dried leaves in a jar, seal it, and leave it for a day. If any condensation appears on the glass, the herbs were not dry enough.
Return them to the drying spot for a few more days and test again. This takes seconds and can save a whole batch.
Let everything cool completely before packing. Warm herbs sealed into a jar sweat, and sweating means mould.
🏷️ Storing and Labelling Your Dried Herbs
Good storage keeps the work you have done. Light, heat and air are the three things that fade flavour, so tackle all three.
Use airtight jars or tins and keep them in a cupboard rather than on a sunny windowsill, however pretty the display. Dark glass or tins are ideal; clear jars are fine if they live in a cupboard. Keep the leaves as whole as you can and crush them only when you cook, since whole leaves keep their oils far longer than crumbled ones.
Label every jar with the herb and the date you dried it. A strip of masking tape and a pen will do.
As a general guide, dried herbs are at their best for roughly a year, after which they fade gradually rather than going off. If a jar smells of little more than dust, it is time to replace it.
🍂 A Simple Autumn Plan
If all this feels like a lot, here is the gentle version. On the next dry morning, cut your woody herbs and hang them in small bundles somewhere warm and airy.
Freeze the soft ones. Label everything, then leave it for a fortnight.
Look at what else is happening in the garden too. October is busy, and our October garden jobs guide will help you fit herb preserving around the rest of the list. If you are still planning next year’s herb beds, our beginner’s guide to growing outdoor garden herbs is a good place to start.
Drying and preserving herbs is one of those small rituals that makes the end of the growing year feel generous rather than sad. A few jars on a shelf in January, smelling of summer, are the best reward a gardener gets.


