How to Grow Orchids from Seed: A Complete UK Guide

I sometimes use affiliate links in content. This doesn’t cost you anything but I may make a commission payment from anything you buy through these links. As an Amazon Associate I earn from qualifying purchases. All opinions remain my own.
Growing orchids from seed is one of the strangest and most rewarding challenges in home horticulture. Unlike almost anything else in the garden, an orchid seed cannot grow on its own. It has no food reserve of its own, and in nature it depends entirely on a partnership with a specific soil fungus just to germinate at all.
For UK growers, this makes orchid seed raising a genuinely different project to anything else on a windowsill. There is no packet of compost to sprinkle seed onto and no simple “sow, water, wait” routine. Instead, home growers either recreate a sterile flask environment or work with the natural fungal partnership the orchid needs, and both routes take real patience.
This guide covers what UK gardeners actually need to know: the two realistic methods for growing orchids from seed at home, the kit worth buying versus what to skip, how to manage temperature and light through a British year, and what tends to go wrong. There is also a look at the UK’s most famous orchid seed-raising project, run by school students in Somerset, as proof that this is genuinely achievable outside a laboratory.

Why Orchid Seeds Are Different From Every Other Seed
Most seeds carry a small store of food, usually a starchy endosperm, that fuels the embryo until it can produce its first true leaves and start feeding itself. Orchid seeds skip this step almost entirely. A single orchid seed pod can contain hundreds of thousands of seeds, but each one is little more than an embryo wrapped in a thin seed coat, with no meaningful food reserve at all.
Forged & Grown
Garden pieces, printed to order
3D printed planters and garden accessories, made in the UK. Self-watering designs, sculptural shapes, colour options — each one made when you order it.


In the wild, this is solved by mycorrhizal fungi. Orchid seeds only germinate after being colonised by a compatible fungus, which infiltrates the seed and supplies the sugars and nutrients the embryo needs to develop. This relationship is why wild orchid populations can be so slow to establish and why some orchid species are notoriously difficult to reintroduce to former habitats, including several native UK species that conservation charities have spent years trying to propagate.
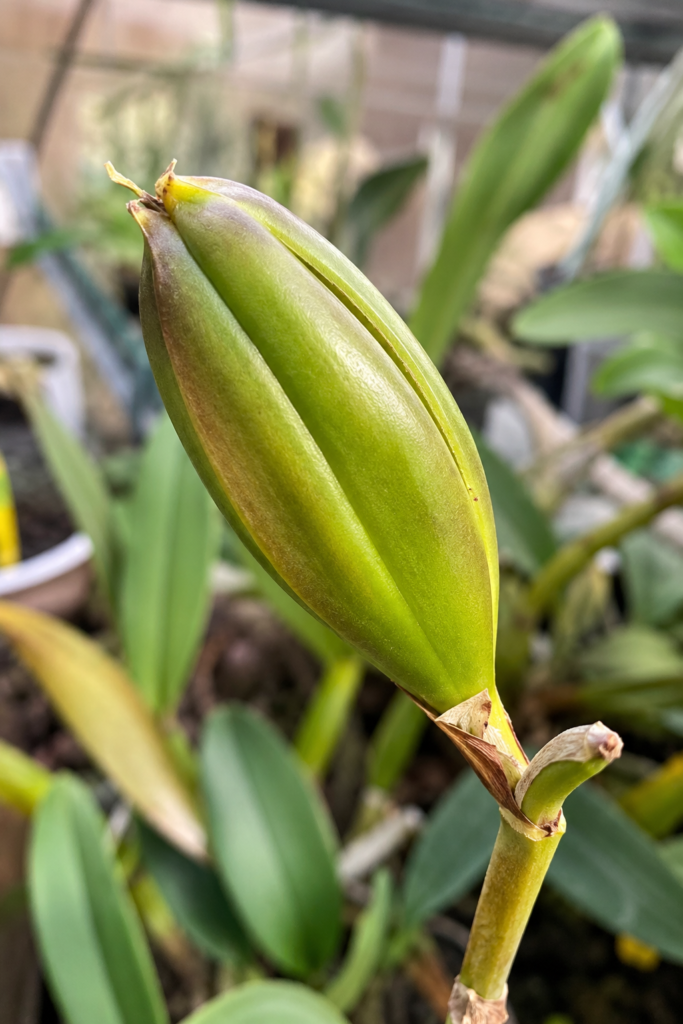
Home growers get around this dependency in one of two ways. Symbiotic germination recreates the natural fungal partnership, using a specific mycorrhizal culture paired with the seed. Asymbiotic germination replaces the fungus altogether with a sterile nutrient agar, sometimes called flask culture, that feeds the embryo directly.
Asymbiotic (flask) germination is by far the more common approach for home growers and hobby orchid societies in the UK, mainly because reliable mycorrhizal cultures matched to a specific orchid species are hard to source outside specialist conservation programmes. This guide focuses mainly on the flask method, with symbiotic growing covered as a route for growers working with UK native terrestrial orchids.
Symbiotic vs Asymbiotic Germination
Which method suits your project
| Symbiotic | Asymbiotic (Flask) | |
|---|---|---|
| How it works | A compatible mycorrhizal fungus colonises the seed and supplies the sugars the embryo needs, recreating the natural wild partnership. | A sterile nutrient agar replaces the fungus entirely, feeding the embryo directly in a controlled flask environment. |
| Core equipment | Matched mycorrhizal culture, sterile growing medium, clean working conditions. | Sterile agar medium, glass flasks, seed sterilising solution, still-air box or laminar flow setup. |
| UK availability | Limited. Matched fungal cultures are mostly sourced through specialist native orchid conservation suppliers. | Good. Sterile agar kits and flask supplies are widely available from UK orchid society and hobbyist suppliers. |
| Best suited for | UK native terrestrial orchids and conservation-focused propagation projects. | Most home growers, including Phalaenopsis, Cattleya and other popular hybrid and species orchids. |
| Beginner difficulty | Harder to start, mainly due to sourcing the correct fungal match rather than the technique itself. | More accessible starting point, though sterile technique still takes practice to get consistently right. |
For most UK beginners: asymbiotic flask culture is the more practical starting point, since sterile agar kits are far easier to source than a matched mycorrhizal fungus.
The Writhlington Orchid Project: A UK Success Story Worth Knowing
Before getting into technique, it is worth knowing that this is not a niche pursuit reserved for professional laboratories. Writhlington School in Somerset runs one of the best known school-based orchid propagation projects in the world, with students growing orchids from seed in flask culture and going on to win awards at RHS Chelsea Flower Show.
The project is a genuinely useful reference point for UK home growers, because it proves that flask-based seed raising can be done reliably with modest equipment and a methodical approach, not just in a commercial lab. Many of the techniques covered below are the same core principles that underpin school and hobbyist orchid propagation across the country.
What You’ll Need Before You Start
For asymbiotic (flask) germination:
- Sterile nutrient agar medium formulated for orchid seed, available pre-made or as a powder to mix and autoclave yourself
- Clean glass flasks or specimen jars with lids, sterilised before use
- A seed sterilising solution, typically a very dilute bleach and water mix used briefly to remove surface contaminants from the seed coat
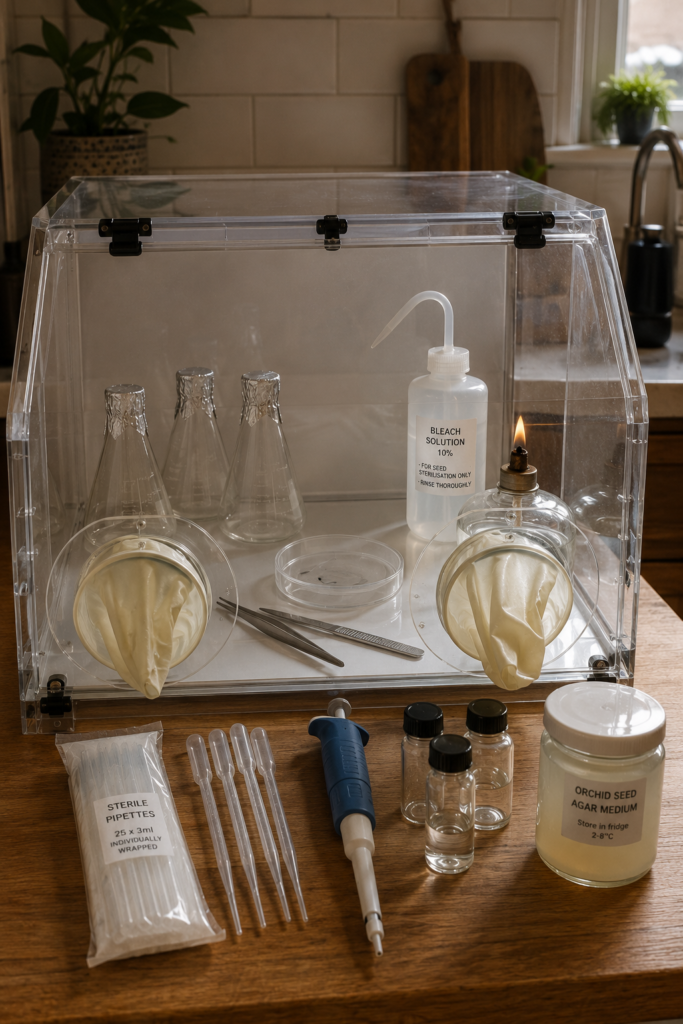
- A still-air box or a small laminar flow setup to keep airborne mould spores away from the sterile medium while you work
- A heated propagator or warm, stable spot to hold flasks at the right temperature
- Grow lights or a bright windowsill, since natural UK daylight alone is rarely strong or consistent enough through autumn and winter
For symbiotic germination (native terrestrial orchids):
- A compatible mycorrhizal fungal culture, usually sourced from a specialist native orchid conservation supplier rather than a general garden centre
- A sterile growing medium such as agar or a fine seed-and-fungus compost mix
- The same clean, low-contamination working conditions as flask growing
Buying named branded kits is not something this guide will point you toward. Search instead for the category of product you need, such as an orchid seed sowing flask kit, a sterile agar propagation medium, or a small still-air glovebox for seed sterilisation, and compare a few UK suppliers before choosing.
Step-by-Step: Growing Orchids from Seed Using Flask Culture
1. Choose Your Seed and Check Viability
Orchid seed loses viability quickly compared with most garden seed, so freshness matters. If you’re collecting from your own plant’s seed pod, this is usually harvested once the pod has swollen and just before it splits, which can take anywhere from three months to over a year depending on the species.
Bought seed should come from a reputable orchid society or specialist supplier and be used as soon as possible after arrival. Older seed can still germinate, but expect lower and slower success rates the longer it has been stored.
2. Prepare a Sterile Work Area
Contamination is the single biggest cause of failure in home flask culture, and it is worth taking this step seriously. Wipe down your work surface with a diluted alcohol solution, work inside a still-air box if you have one, and sterilise all tools and containers before you begin.
Any mould or bacterial spore that lands on the nutrient agar will usually outcompete the orchid seed for food within days, ruining the flask. A calm, draught-free environment with everything laid out in advance makes a real difference here.
3. Sterilise the Seed Surface
Orchid seed needs a brief surface sterilisation before sowing, since seed coats can carry mould spores even when the seed itself is perfectly healthy. A short soak, typically no more than ten to fifteen minutes, in a very dilute bleach solution is standard practice, followed by several rinses in sterile water.
Timing matters more than strength here. Oversoaking can damage the embryo, while undersoaking leaves contaminants behind, so follow the ratio given with whatever sterilising solution you buy rather than guessing.
4. Sow the Seed onto the Growing Medium
Using a sterile pipette or syringe, distribute the seed suspension evenly across the surface of the prepared agar in each flask. Orchid seed is sown on the surface rather than buried, since the embryo needs both the nutrient medium beneath it and light or diffuse brightness above it to develop.
Reseal the flask immediately after sowing to protect the sterile environment inside.
5. Provide Stable Warmth and Light
Most orchid seed germinates best somewhere between 20°C and 25°C, which in a UK home usually means a heated propagator or a warm, draught-free room rather than a windowsill in winter. Consistency matters more than getting the exact number right, since fluctuating temperatures slow germination and stress the developing protocorms, the small green growths that appear first.
Bright, indirect light for around twelve hours a day supports healthy development once the seed has germinated. Given how weak and short British winter daylight is, a small grow light on a timer is usually more reliable than relying on a windowsill from October through to March.
6. Wait for Germination and Protocorm Development
Germination timescales vary enormously by species, from a matter of weeks for some Phalaenopsis crosses to well over a year for slower terrestrial species. What you are watching for first is the seed swelling and turning green, which marks the early protocorm stage, followed by the emergence of tiny rhizoids and eventually the first true leaf.
This is the stage that tests patience the most. Flasks can sit with little visible change for months before development suddenly accelerates, so resist the urge to open and check too often, since every opening is another chance for contamination.
7. Transfer Seedlings to a Fresh Flask or Community Pot
Once seedlings have several leaves and a small root system, they are usually moved either to a fresh flask with new nutrient agar to give them more space, or “deflasked” into a community pot of fine orchid seedling compost if they are large enough to survive outside sterile conditions. This is a gradual transition, not a single leap from flask to greenhouse.
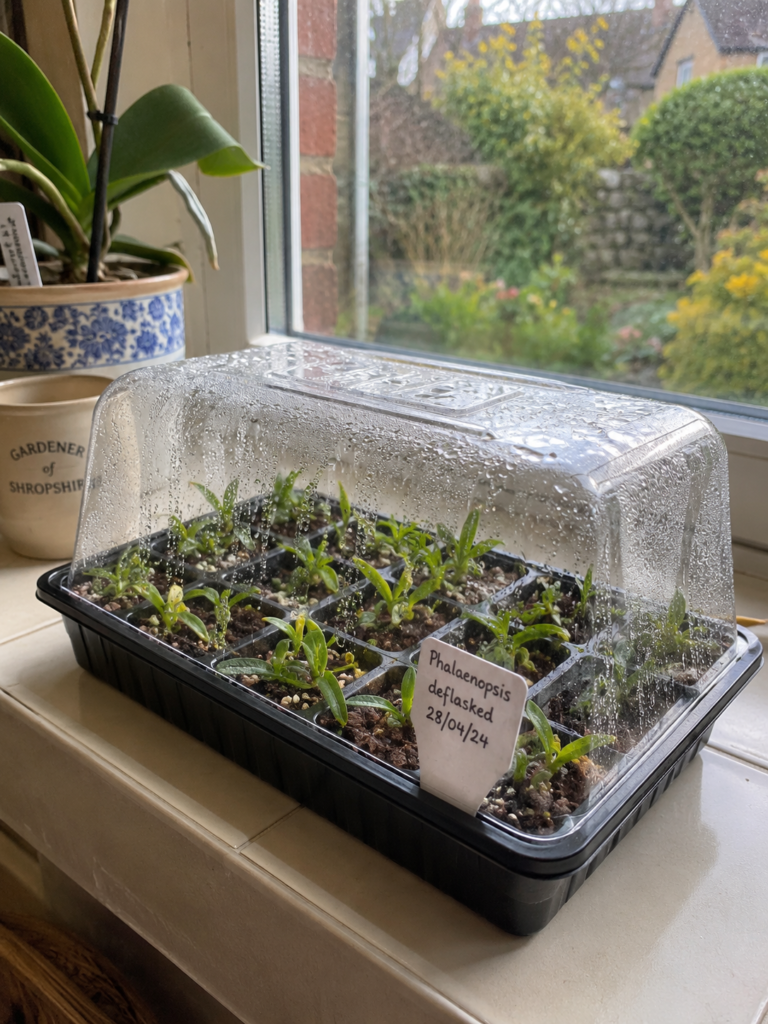
Seedlings moved out of a flask need very high humidity at first, often kept under a propagator lid or in a covered tray, with humidity reduced gradually over several weeks as the plants harden off.
UK Growing Conditions: Managing a British Home Through the Year
British homes present a specific challenge for orchid seedlings that growers in naturally warm, humid climates don’t face in the same way: central heating dries the air dramatically through autumn and winter, while summer light levels swing from long, bright days to grey, overcast stretches within the same week.
UK Seasonal Care Timeline: Orchid Seedlings
Tap a month to see light, humidity and temperature guidance
January
Light: Grow light essential, 12 hours a day. UK daylight is too weak and short on its own this month.
Humidity: Central heating is at its worst for drying indoor air. Keep humidity trays or propagator lids on, checked daily.
Temperature: Keep seedlings well away from cold windowsills overnight. Aim for a steady 20 to 22°C.
Regional note: growers in Scotland, Northern England and Wales should lean on a heated propagator year-round. Southern England and the Midlands can often ease off supplemental heat from late spring to early autumn.
Autumn and winter (roughly October to February): This is the hardest stretch for UK orchid seedlings. Central heating can push indoor humidity down to levels that stress newly deflasked seedlings badly, so a humidity tray or small propagator with the lid ajar is worth setting up before the heating season starts rather than after seedlings start struggling. Daylight is also the limiting factor, and a modest LED grow light on a twelve-hour timer will do more for seedling development than anything else during these months.
Spring (March to May): As UK daylight lengthens, seedlings that were under grow lights can often move to a bright windowsill, though a south-facing sill may need light curtain protection as the sun strengthens through April and May. This is also typically the best window for deflasking seedlings that germinated the previous autumn or winter, since the improving light and lengthening days give them the best chance of establishing before the demands of summer heat arrive.
Summer (June to August): Ventilation becomes more important than warmth for most of the UK during summer. A conservatory or greenhouse can overheat quickly on a hot British day even with outdoor temperatures that would seem mild elsewhere, so shading and airflow matter more than extra heat at this point in the year.
Regional note: Growers in Scotland, Northern England, and Wales generally get less reliable summer warmth and should lean more heavily on a heated propagator or a consistently warm indoor spot year-round, while growers in Southern England and the Midlands may find a conservatory or lean-to greenhouse is warm enough for seedling growing-on from spring through early autumn without supplementary heat.
Common Problems and How to Fix Them
Mould or bacterial contamination inside the flask. This is almost always down to non-sterile technique during sowing rather than anything that happens afterwards. If contamination appears, the flask usually cannot be saved, so the priority is reviewing your sterilising process, work area, and tool cleaning for next time rather than trying to rescue the current batch.
No visible germination after several months. Before assuming failure, check the expected germination timescale for your specific orchid species or hybrid, since some genuinely take a year or more. If the seed has visibly discoloured or the agar has dried out or shrunk away from the flask sides, the medium has likely failed and a fresh sowing is the better use of time than continuing to wait.
Seedlings collapsing after deflasking. This is usually a humidity problem. Seedlings straight out of sterile flask culture have no protective waxy cuticle built up yet, and moving them into normal room humidity too fast causes rapid moisture loss. Returning them to a covered, humid environment and reducing humidity far more gradually over several weeks usually resolves this.
Slow, weak growth in seedling compost. Check that the seedling mix is fine enough for young roots, since standard bark-based adult orchid compost is usually too coarse for seedlings and can leave roots without enough contact with moisture. A finer seedling-grade mix, sometimes blended with sphagnum moss, is generally easier for young root systems to establish in.
Algae growing on the compost or flask surface. This points to too much light reaching a wet surface rather than a plant health problem in itself. Reducing direct light exposure to the medium surface, improving airflow, and avoiding overwatering usually brings it under control.
From Seedling to First Flower: What to Expect
This is worth being honest about, since it's the question most beginners underestimate. Orchids grown from seed typically take anywhere from three to seven years to reach flowering size, with the exact timescale depending heavily on species and growing conditions. Phalaenopsis hybrids tend to be on the faster end of that range, while many species orchids, particularly slower-growing terrestrials, sit well beyond it.
This is a project measured in years, not seasons, which is part of what makes it such a distinctive undertaking compared with almost anything else grown from seed in a UK home. Many hobbyist growers treat the process itself, watching protocorms develop into leaves and then into a mature plant, as the reward, rather than treating the eventual flower as the only marker of success.
Time to Flower Estimator
Select an orchid type to see a realistic timeline
Estimated time to first flower
3 to 4 years
The fastest common route from seed to flower. Warm, consistent growing conditions and steady light through the seedling stage keep growth on the shorter end of this range.
These are general ranges, not guarantees. Growing conditions, individual plant vigour and the specific species or cross all affect the real timeline.
Frequently Asked Questions
Can I grow orchids from seed collected from a supermarket Phalaenopsis?
Yes, provided the flower was pollinated and produced a viable seed pod, which supermarket orchids rarely do without deliberate hand pollination. If you want seed from a specific plant, you'll usually need to pollinate it yourself using a cocktail stick to transfer pollinia between flowers, then wait for the pod to develop and mature before harvesting.
Do I need a laboratory to grow orchids from seed at home?
No, but you do need a genuinely sterile technique. A still-air box, sterilised tools, and careful handling can achieve good results at home, as UK projects like the Writhlington Orchid Project have shown repeatedly with school-level equipment rather than commercial lab facilities.
Why is my orchid seed not germinating even though the flask looks clean?
The most common causes are seed that wasn't viable to begin with, temperatures outside the optimal range for the species, or a nutrient medium that isn't well suited to that particular orchid genus. Different orchid genera can need noticeably different agar formulations, so checking the medium recommendation for your specific type of orchid is worth doing before assuming the seed has failed.
Is symbiotic or asymbiotic germination better for a UK beginner?
Asymbiotic flask culture is generally the more practical starting point for most home growers, since sterile agar kits are more widely available than matched mycorrhizal fungal cultures. Symbiotic germination is worth exploring specifically if you're working with UK native terrestrial orchids, where matching the correct native fungus is part of genuine conservation value.
How long can orchid seed be stored before it loses viability?
This varies by species, but most orchid seed keeps reasonably well for six months to a year if stored cool, dry, and in the dark, ideally in a sealed container with a desiccant. Viability drops off after that, so sow stored seed as soon as you reasonably can rather than letting it sit for several years.
Can I grow orchids from seed without any special equipment at all?
Not realistically for asymbiotic flask growing, since the sterile technique is what makes germination possible at all outside the presence of the natural fungal partner. If you want to start with something closer to conventional seed sowing, propagating orchids from division or keiki (plantlets that some orchids produce naturally) is a far simpler entry point while you build up the equipment and confidence for seed raising.
What temperature should I keep orchid seedlings at over a UK winter?
Most flask-grown seedlings do best held around 20°C to 22°C through winter, which typically means keeping them away from cold windowsills and draughts and closer to a heated propagator or a consistently warm room. A sudden cold snap, even overnight, can set seedling development back noticeably.
Continue Your Journey
If you're building out a wider growing-from-seed or indoor plant project this year, these guides pair naturally with orchid seed raising:
For more on managing UK indoor growing conditions through the seasons, see our guide to growing blueberries indoors and our roundup of small fruit plants to grow indoors.
If propagating plants from seed at home has caught your interest, our guide to growing stunning fuchsias covers another patience-testing seed-to-flower project, while growing asparagus from cuttings looks at a different, non-seed propagation route.
For more on keeping tender or tropical plants happy through a British year, our guides to spring care for citrus trees and growing lemons cover similar conservatory and windowsill growing challenges.
And if you're just getting started with UK growing more broadly, our beginner's guide to allotment gardening and our guide to UK companion planting are good places to keep exploring.